Table of Content
- Overview
- Step 1: Create a New Folder for the Plugin in local directory
- Step 2: Open Command Prompt and Navigate to the Folder
- Step 3: Initialize the Plugin Project
- Step 4: Rename the Plugin Class File
- Step 5: Add Twilio NuGet Package
- Step 6: Add Plugin Code
- Step 7: Strong-Named Assembly Error
- Step 8: Fixing Strong-Naming Issues
- Step 9: Deploy to Dynamics CRM
- Conclusion
- FAQ’s
Overview
When developing a custom plugin for Microsoft Dynamics 365 CRM, using third-party libraries like Twilio often becomes necessary — for instance, to generate JWT tokens for voice/video communication. However, Dynamics CRM only accepts a single strong-named (signed) DLL for plugin assemblies, and external libraries like Twilio come as separate DLLs that are not strong-named by default.
This blog explains how to:
- Create a CRM plugin project
- Add and use the Twilio library
- Handle strong-naming issues
- Merge or substitute external libraries
- Deploy to CRM using Plugin Registration Tool
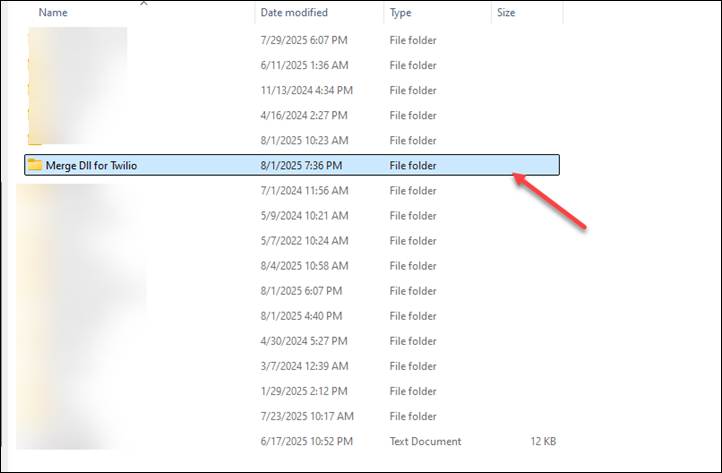
Step 1: Create a New Folder for the Plugin in local directory
Create a folder to hold your plugin source code.
Step 2: Open Command Prompt and Navigate to the Folder
Use CMD and navigate to the folder you created:
cd path\to\your\folder
Step 3: Initialize the Plugin Project
Run this command to scaffold a plugin project:
pac plugin init
This generates the following files:

Once you run the above command the project will be created successfully.
Note: If the Microsoft powerflate form CLI is not installed we have to install before creating the Project
we just need to run below command in CMD
dotnet tool install global Microsoft.PowerApps.CLI.Tool
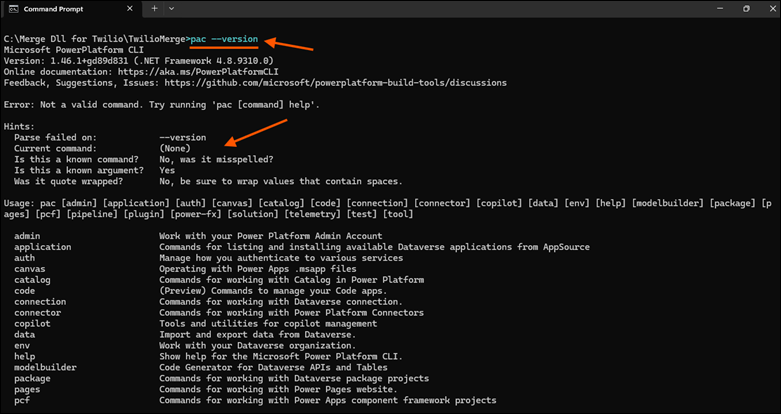
After installation, verify by running:
pac –version
Step 4: Rename the Plugin Class File
Open the solution in Visual Studio and rename Plugin1.cs to GenerateTwilioTokenPlugin.cs. Update the class name and namespace accordingly.
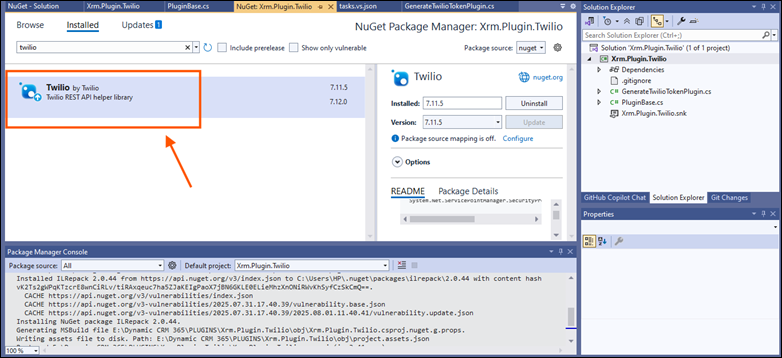
Step 5: Add Twilio NuGet Package
Open NuGet Package Manager and install:
Twilio
These libraries are required to generate a Twilio token.
Step 6: Add Plugin Code
Paste the following code in your plugin class:
using Microsoft.Xrm.Sdk;
using System;
using System.Collections.Generic;
using Twilio.Jwt.AccessToken;
namespace Xrm.Plugin.Twilio
{
public class GenerateTwilioTokenPlugin : PluginBase
{
public GenerateTwilioTokenPlugin(string unsecureConfiguration, string secureConfiguration)
: base(typeof(GenerateTwilioTokenPlugin))
{
}
// Entry point for custom business logic execution
protected override void ExecuteDataversePlugin(ILocalPluginContext localPluginContext)
{
if (localPluginContext == null)
{
throw new ArgumentNullException(nameof(localPluginContext));
}
var context = localPluginContext.PluginExecutionContext;
string identity = “crm_user_” + Guid.NewGuid().ToString().Substring(0, 8);
var accountSid = “ACXXXXXXXXXXXXXXXXXXXXXXXXXXXXX”;
var apiKey = “SKXXXXXXXXXXXXXXXXXXXXXXXXXXXXXX”;
var apiSecret = “JLXXXXXXXXXXXXXXXXXXXXXXXXXXXXXXXX”;
var appSid = “AXXXXXXXXXXXXXXXXXXXXXXXXXXXXXXXXX”;
var grant = new VoiceGrant
{
OutgoingApplicationSid = appSid,
IncomingAllow = false
};
var token = new Token(accountSid, apiKey, apiSecret, identity, grants: new HashSet<IGrant> { grant });
var jwt = token.ToJwt();
context.OutputParameters[“TwilioToken”] = jwt;
}
}
}
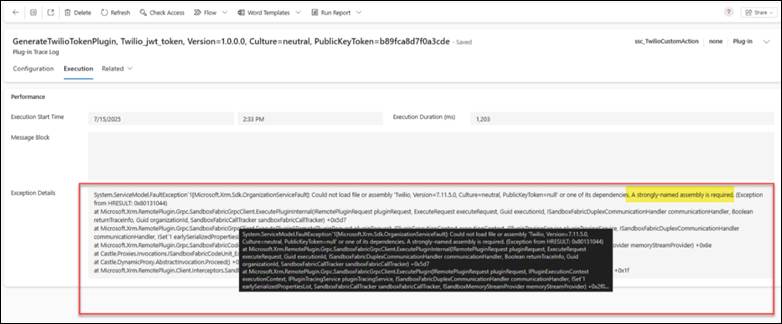
Step 7: Strong-Named Assembly Error
When you try to register the plugin in CRM, you may encounter this error:
Could not load file or assembly ‘Twilio.Jwt.AccessToken, Version=…’. A strongly-named assembly is required.
This is because:
- CRM requires all plugin DLLs to be strong-named
- Twilio’s NuGet DLLs are not strong-named
Step 8: Fixing Strong-Naming Issues
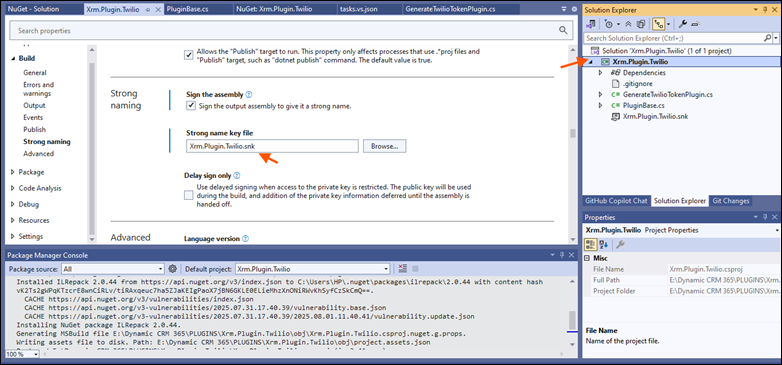
Step 8.1: Sign Your Plugin Assembly
In Visual Studio:
- Right-click on the project → Properties
- Go to the Signing tab
- Check Sign the assembly
- Create or select a .snk key file
Step 8.2: Use Strong-Named Versions of Dependencies
Instead of using ILRepack, install strong-named versions of the required libraries. For example:
You can download the Strong-Name Signer tool directly from NuGet:
Install-Package StrongName
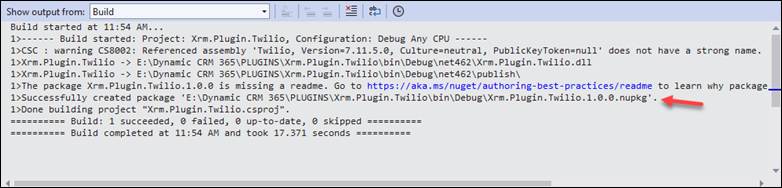
Step 8.3: Merge DLLs
After building the plugin project, use ILRepack to combine your plugin DLL and the Twilio DLLs into one strong-named assembly:
Ensure all referenced DLLs are included in the merge command.
Step 9: Deploy to Dynamics CRM
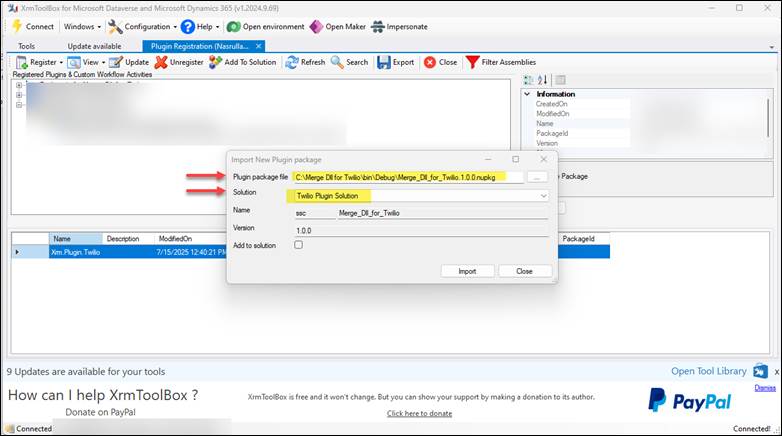
Now, register the MergedPlugin.dll using the Plugin Registration Tool:
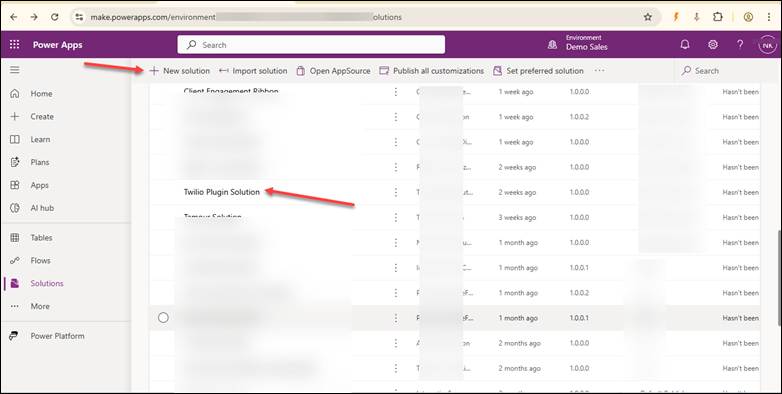
- Connect to your environment
- Open Power Apps and create and empty Solution
- Open Plugin Registration Tool in XRM
- Click on register new Package
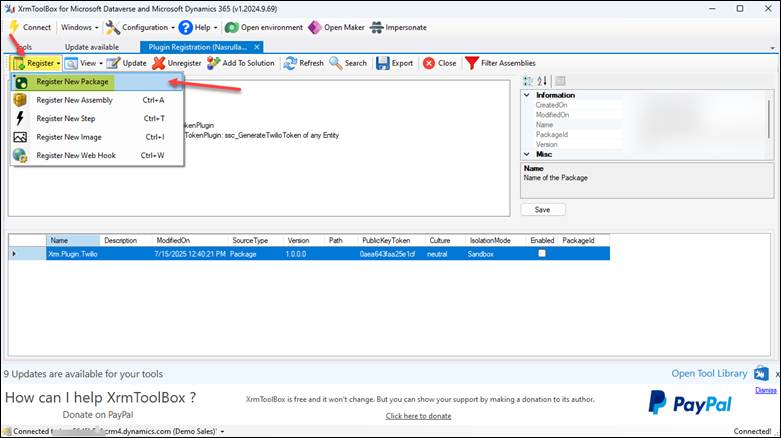
- Choose the Nuget package created from the Project and select the solution we have created
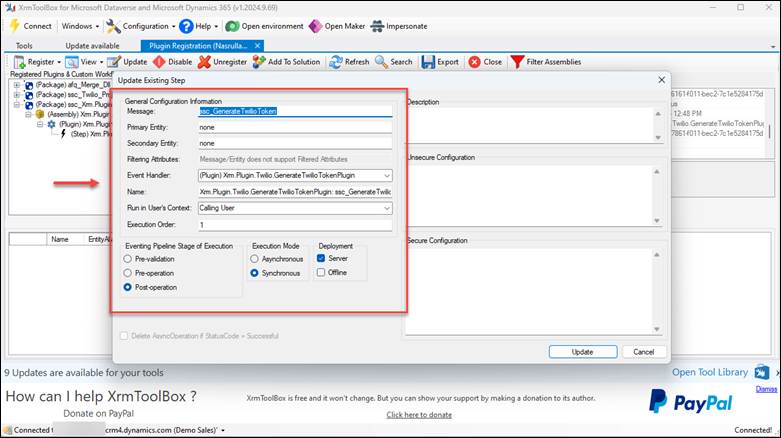
- Complete registration and bind it to a step/action
Conclusion
Integrating third-party libraries like Twilio in Dynamics CRM plugins can be tricky due to strong-naming constraints. However, with the right setup:
- You can develop powerful plugins
- Sign them appropriately
- Use strong-named versions of dependencies
- Simplify deployment using .nupkg packages
Once deployed, your custom plugin can be triggered via JavaScript, Custom Actions, or Workflows—unlocking Twilio-powered communication features within your CRM.
Read more : data governance in dynamics 365 made simple
FAQ’s
Yes, but you must merge them into a single strong-named DLL before deployment.
Dynamics CRM only accepts strong-named plugin assemblies, but Twilio doesn’t sign its DLLs by default.
Use ILRepack to combine your plugin DLL with Twilio’s DLLs into a single signed assembly for CRM deployment.
![]() is a software solution company that was established in 2016. Our quality services begin with experience and end with dedication. Our directors have more than 15 years of IT experience to handle various projects successfully. Our dedicated teams are available to help our clients streamline their business processes, enhance their customer support, automate their day-to-day tasks, and provide software solutions tailored to their specific needs. We are experts in Dynamics 365 and Power Platform services, whether you need Dynamics 365 implementation, customization, integration, data migration, training, or ongoing support.
is a software solution company that was established in 2016. Our quality services begin with experience and end with dedication. Our directors have more than 15 years of IT experience to handle various projects successfully. Our dedicated teams are available to help our clients streamline their business processes, enhance their customer support, automate their day-to-day tasks, and provide software solutions tailored to their specific needs. We are experts in Dynamics 365 and Power Platform services, whether you need Dynamics 365 implementation, customization, integration, data migration, training, or ongoing support.